This post may contain affiliate links.
If you’re like me, you probably have a collection of plain vases tucked away in a cabinet somewhere, just waiting to be put to good use. Well, it’s time to dust them off and give them a makeover.
Whether they’re basic florist vases or thrift store finds, these vessels are begging for a refresh. Trust me, they’re eager to be repurposed.
So, imagine transforming an old vase into a stunning terracotta masterpiece with just a few simple steps. It’s easy—and more affordable—than you might think. Join me for a step-by-step DIY guide on painting a vase with acrylic paint.
Supplies Needed
Let’s start by gathering all the supplies and materials needed.
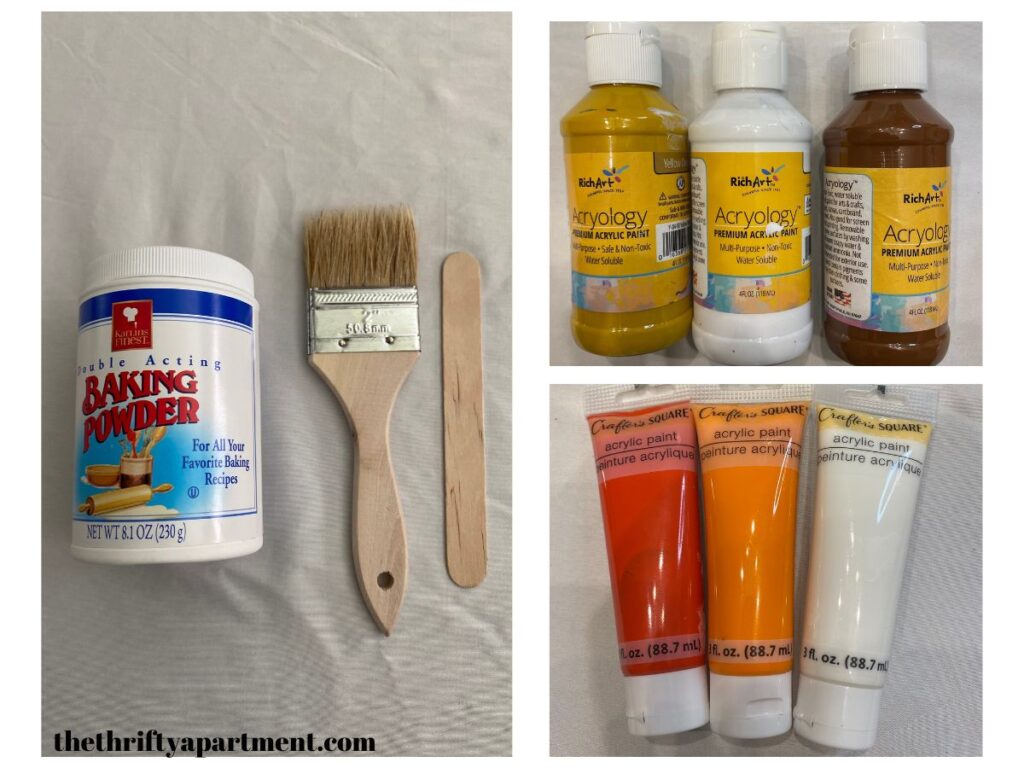
- Acrylic Paint – I bought them here at dollar tree but you can also buy them up here. Any paint color including neutral or vibrant colors will do. Paint can be mixed to create the desired color.
- Baking Powder (to give it a clay matte finish)
- Vase (Any glass or ceramic kind will work)
- Small paint brush
- Cloth Rags or Paper Towel
- Craft Stick
- Glass Container (for stirring paint mix)
How to Paint a Basic Vase
Step 1: Select Your Vase
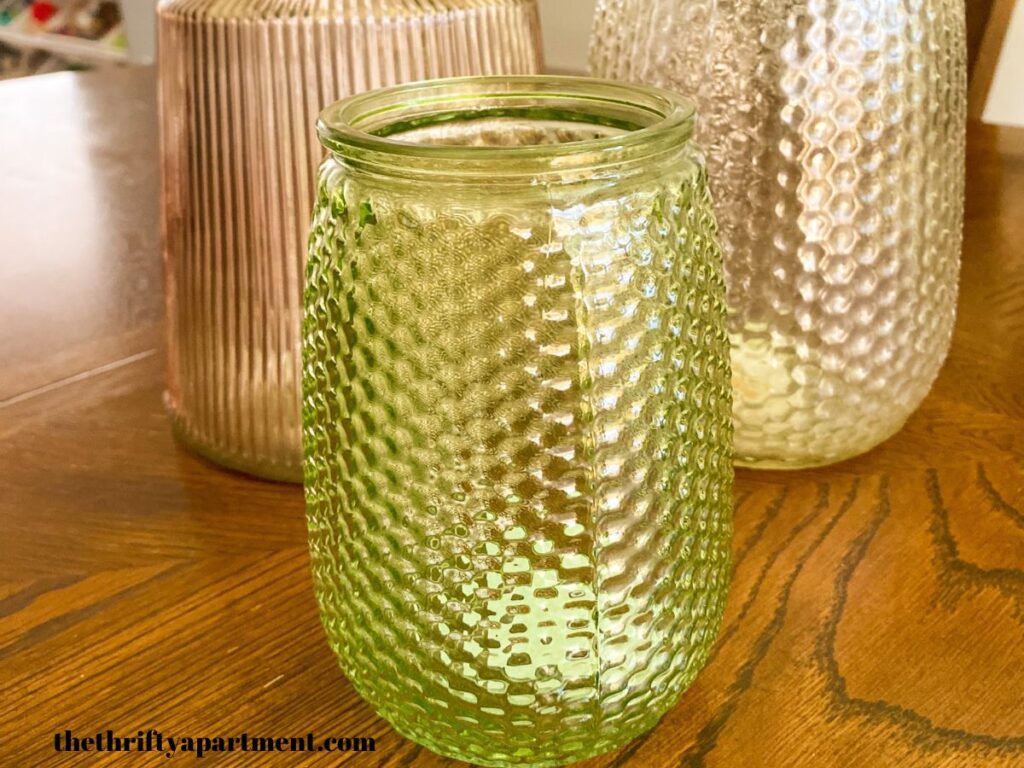
First things first, find the style of vase that you want. If you don’t have any vases handy, head to your local thrift store or dollar store and try spending a couple of dollars.
There’s usually an abundance of vases available in all different patterns, shapes, and sizes for as little as $1. And don’t be shy about the price because I promise you that once you are done, no one will know you bought a Dollar Tree vase.
Besides, dollar store vases are great for this type of DIY project.
Step 2: Clean the Vase
The next step is to clean the vase thoroughly. Wipe it down (or wash it if it’s really filty), then pat it dry. Remove any tags or stickers.
Step 3: Mix the Ingredients
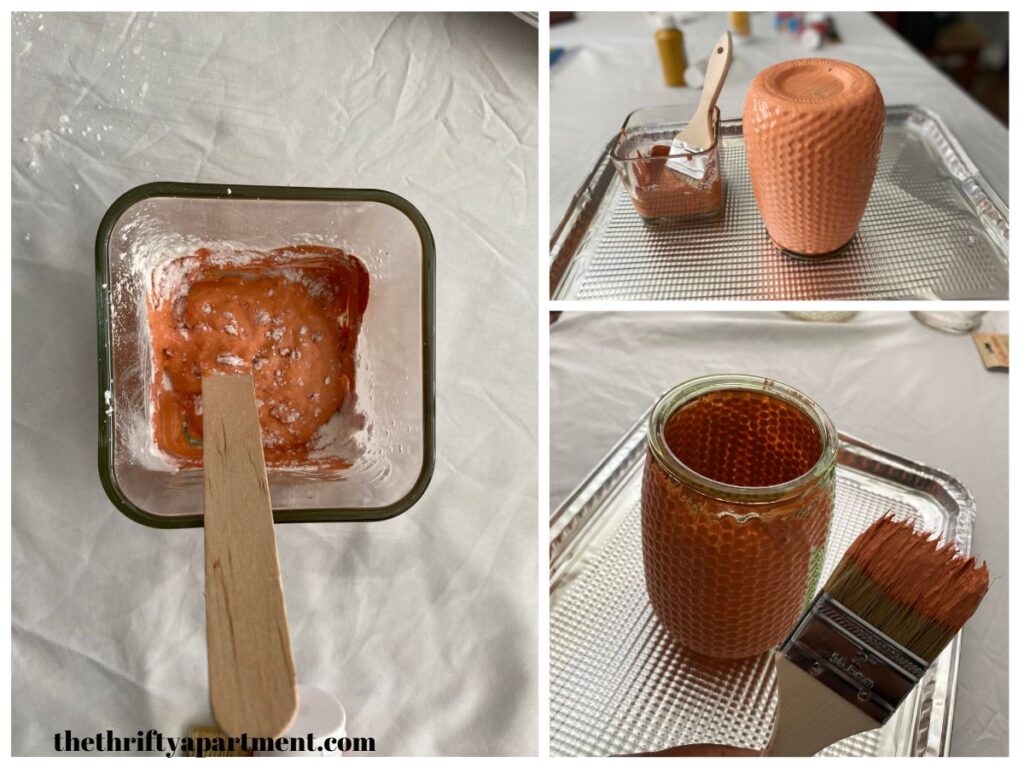
To begin, pour the desired amount of acrylic paint into a container. I usually just eyeball it, but roughly one cup of paint works well. Then, for every cup of paint, add two tablespoons of baking powder.
Stir the mixture thoroughly using a craft stick until the baking powder is evenly distributed. If you prefer thicker paint, feel free to add more baking powder to the container.
Experiment with different acrylic paint colors by mixing darker shades with lighter ones. I found that adding white paint can help tone down the color and achieve the desired terracotta shade. Since terracotta has nuanced brown undertones, it may take some trial and error to get the perfect hue. Keep mixing until you’re satisfied with the color you’ve created.
Step 4: Apply the Mix
Start by applying the first coat of paint mixture to the entire exterior of the vase using a small paintbrush. Be mindful of your brush strokes, and try to paint in one direction to minimize brush marks and streaks.
Don’t overlook the bottom of the vase; ensure it’s fully covered with paint as well, as this area can often be missed. For a more cohesive look, consider adding a bit of paint to the inside of the vase.
If you encounter any excess drips while painting, simply clean them up with a rag to maintain a neat finish.
Step 5: Let it Dry
Allow the first coat of paint to dry thoroughly, which typically takes around 1-2 hours. It’s important to give it adequate time to dry completely before proceeding.
Step 6: Paint a Second Coat
The number of coats you apply will ultimately depend on the desired look and finish you’re aiming for. Applying two coats of paint should be sufficient, but if you desire additional texture, feel free to add a third coat.
Once the final coat is applied, allow the vase to dry overnight for optimal results.
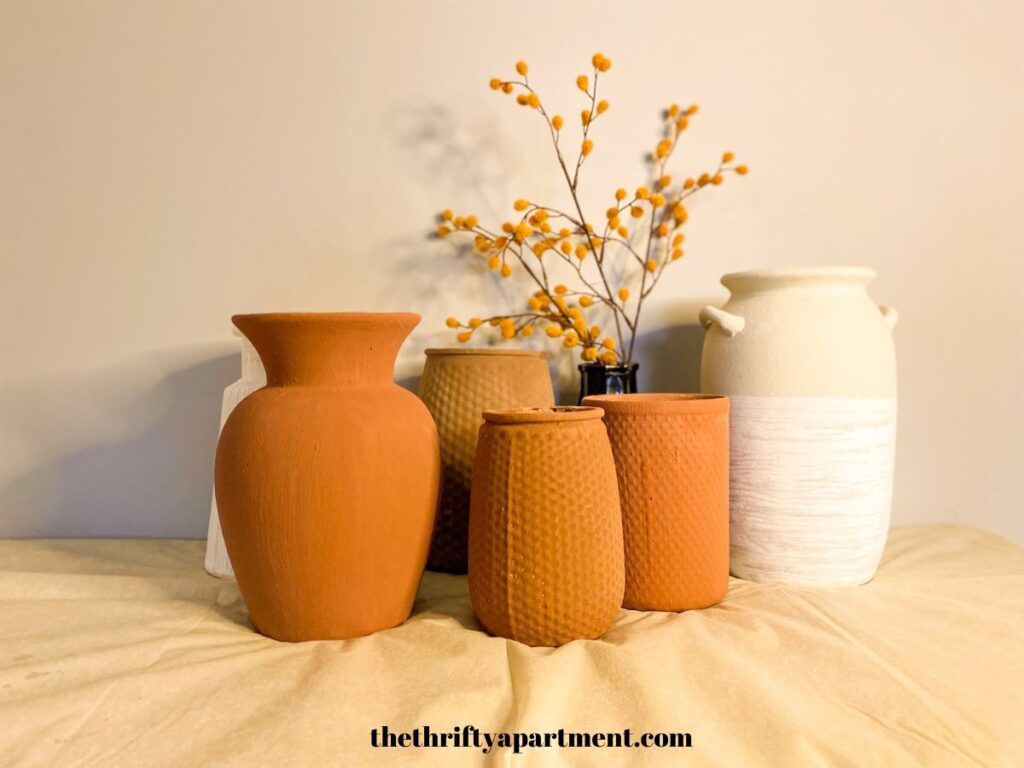
And there you have it – a modern-looking terracotta painted vase. What a work of art!?
It is important to note that this process can also be done on any bottle (including wine bottles), glass jars, or plant pots. However, I used a combination of plain glass vases to DIY and an old dated ceramic vase. These new DIYed ceramic-looking glass items are also great for Styling your Bookshelves.
Don’t have baking powder?
You can substitute baking powder with baking soda if you don’t have baking powder. Baking soda will provide very similar results as baking powder. While you won’t notice a huge difference between the two, I used baking powder because it is thicker and provides a more realistic ceramic appearance. However, the choice is yours to make.
So, what are you waiting for? Try out this project with the girls or guys on paint night at your house – they will love the art lesson. Glass painting and upcycling can be lots of fun.
Alternative Ways to Upcycle a Vase
There are a couple of other ways that you can DIY your vase.
Spray Painting
For a quick and budget-friendly option, consider spray painting the exterior of the vase. You can easily find spray paint at your local home improvement store or craft store like Hobby Lobby. Opt for a matte or chalky finish for a modern look. You could also create a two-tone effect by using painter’s tape to cover part of the vase and spray painting the uncovered section.
Twine Wrapping
Twine is a versatile and crafty material that can give your vase a charming look. You can purchase twine inexpensively, often for just $1 at Dollar Stores. Simply wrap the twine around the vase and secure it with glue. It’s a quick and easy way to achieve a shabby chic farmhouse decor vibe.
Metallic Craft Paper
If you have metallic or floral-patterned craft paper lying around, put it to good use! Wrap a piece of craft paper around the vase and glue it down for a simple yet stylish makeover. Feel free to experiment with different colors and patterns to suit your aesthetic preferences.
I hope you have been inspired. Please don’t hesitate to let me know your thoughts by commenting below. Feel free also to follow me on my social media pages – Pinterest and Instagram or subscribe to my mailing list for other design inspiration and home decor ideas.
Tamara White is the creator and founder of The Thrifty Apartment, a home decor and DIY blog that focuses on affordable and budget-friendly home decorating ideas and projects. Tamara documents her home improvement journey, love of thrifting, tips for space optimization, and creating beautiful spaces.

These look great!! I always love a good DIY project 🙂
I LOVE this idea! I know where I can get some cheap vases so such a great idea to paint and upcycle! They look so expensive too!
Super creative! Will share with my daughter who love these ideas.