


My daughters are 18 months apart. For a while, our toddler had her own room while the baby stayed in our bedroom. It was just a matter of time before they started sharing a room. Sharing a room meant combining things and adjusting to a new routine and environment. Most importantly, it meant sharing a closet.
While the room was sufficient enough to hold both girls, the closet, on the other hand, was not. The girls had a lot of “stuff.” We needed to find ways to maximize the closet space so both girls could display their clothing, shoes, blankets, and other important items equally. And the closet needed a makeover to accommodate this.

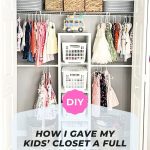
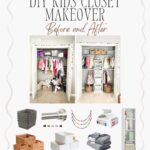
Here’s a look at how I redesigned, reconfigured, and organized the girls’ closet with this sweet DIY kids’ closet makeover.

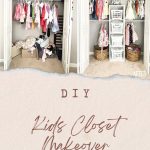
Closet Before Makeover

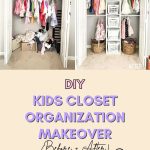
The closet design before the makeover was neither practical nor functional for both girls. It was not a huge closet, but it wasn’t small – though it appeared that way from all the clutter. The single top shelf was a hodge-podge of items – most of which were not being used.

My daughter had already outgrown many items and clothes in the closet. And there were tons of random boxes and bins stuffed with blankets, diapers, and wipes, all shoved into the closet because they had nowhere else to go.
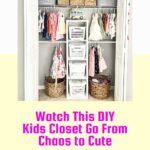
It was a messy closet, and it was time to add function, organization, and style.
The Plan
Before I redesigned the girls’ closet, I took inventory of everything in their bedroom that would be best in their closet. This included items in the closet, loose items on the floor, and the bedroom chair. Every item would need a home in the closet or an alternative storage area.
Having a clear idea of everything that needs to be stored and organized gave me a good sense of how to construct the girls’ closet. One thing is for sure, I needed a lot of space and a ton of bin storage for their small items.
Resources and Supplies
- 4 Cube Organizer (x3)
- Tension Rod (x2)
- Hangers
- White Bins
- Plastic Basket
- Large Baskets
- Small Baskets
- Pom Pom Garland
Tools Used
- Leveler
- Hammer
- Screw Driver
- Tape Measure
Girls Closet Makeover
Step 1 – Remove Everything, Purge, and Clean
It is important to start fresh! The first thing I did was remove every single item from the closet, including bins, hangers, and everything else on the shelves and the rod. Once all the items were removed, I was able to see what I wanted to keep and what needed to either be tossed or donated.

Having an empty space also gave me a blank canvas to work on before starting the makeover.
Thankfully, the closet did not need a fresh coat of paint. However, I did deep clean it by wiping down some of the walls and wire shelves, as well as vacuuming the floors.
Decluttering the space was an important first step and a great way to give the closet a new start. It brought back so many memories. But it was a necessary step to get the girls the closet that would work for them.
Step 2 – Measure the Closet
Measuring the closet helps you get a good sense of how large (or small) it is and what can fit in it.
Measuring the space allows you to make the most of it and maximize its potential. With the measurements, I was able to carefully plan out all the storage solutions and accessories I could incorporate based on size and shape.
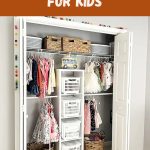
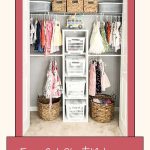
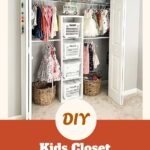
Step 3 – Use the Vertical Cube as a Focal Point
We used the cube as a focal point by placing it in the center of the closet. The cube will be the anchor to the rest of the closet.
Both sides of the closet were currently unused space, and we didn’t want to waste more valuable real estate. It was a pretty deep wall, but it needed some form of open shelving. To satisfy this, I placed another set of cubed shelving units on the far-right and far-left sides of the closet.
The cubes helped me avoid building new shelves while also providing sufficient storage space. The cubes are an excellent closet organizer that fits tightly and neatly into the space. It practically doubled their storage in their small space.
Step 4 – Install the Closet Rods

Kids’ clothes are shorter and smaller than adults’, so a double rod for the kids to hang their clothes made the most sense and took full advantage of vertical real estate.
Since the closet already had existing wire shelving and a wire rod that went from one end of the closet to the other, I opted to keep the wire shelves and rod and complemented it with a double rod 30 inches down on both sides of the closet. I used a tape measure to measure the distance and a leveler to ensure the rod was straight and not tilted during installation.

I opted for a tension rod because it was super easy to install, and since their clothes are small, I wouldn’t have to worry about it falling. It is also easily adjustable.
A double-bar system gave the girls more hanging space for their clothes. We coordinated the clothes by style and season.
Step 5 – Incorporate Storage Solutions

Storage solutions included plastic bins and woven baskets for both functionality and aesthetics.
We kept all the storage solutions and accessories in the same color scheme to give the whole closet a cohesive and clean look. We used all white cubes, hangers, and rods, and added some color with the storage containers.
We got rid of some of the existing bins that no longer worked for the space and used white bins, pink bins for pops of color, and woven rattan baskets in various shapes. We now had large organization bins for bulky items and small bins for smaller items.
Closets, in general, can appear busy, so streamlining the color palette and keeping everything within the same color scheme helps improve the space’s organization and functionality. And most importantly, it gave the space order.
Step 6 – Label Storage Bins and Baskets
Labeling not only encourages tidiness, but it also makes everything easier to find and access in the closet. It makes a big difference in the closet’s presentation. We labeled the bins (after the photos were taken).
Since there were items that were going into long-term storage on the very top shelf, such as Halloween costumes, blankets, and artwork, labeling helped us remember where everything was.
With the labels, we can now check the front of the bin or basket on the high shelf and know exactly what’s in it instead of pulling the bins (some of which are heavy) to access it.
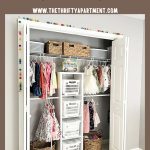
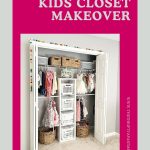
The Finale – Girls Closet Makeover

The toddler closet transformation was a very simple yet impactful DIY project. The girl’s custom closet had a fresh look with much space for them to grow into.
SHOP THE POST


It took me one afternoon to complete this dream closet and add custom touches. The closet was now aesthetically pleasing and functional. And most importantly (and for the first time), it was a truly organized closet. It was the perfect solution to accommodate my girls in their new shared space.