

I think it’s fair to say that wire shelves in our closets are just not very attractive. These types of shelves can look a bit drab and industrial, but they happen to be a standard for many builder-grade homes and newer construction.
While wire shelves are a popular storage solution, I am just not a big fan. My entire house has wire shelving. With wire shelving, it’s commonplace for small items to fall through the wire cracks or appear cluttered and unorganized. Bottles and toiletries refuse to sit up straight, and often times, they tip over due to the uneven wire surface.
So, if you want to refresh your linen closet or pantry closet, I’ve got the perfect hack to upgrade those ugly wire shelves – without using power tools. And the best part is that it costs less than $20 and can be done in under an hour.
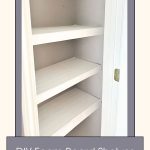
Check out this easy step-by-step guide on creating custom covers for your wire shelves with foam boards and contact paper. Get ready to help transform your ugly wire shelving with this sweet hack.
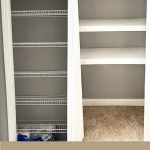
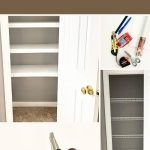
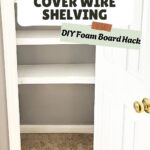
Linen Closet Before Shelf Covers

Here are the wire shelves prior to the update. Not very modern or practical. It was time for a quick change to add functionality and style to the closet.
I desired an even, flat surface and desperately wanted to make the wire shelves look better. So I decided to cover them up with something more decorative, practical, and uber cheap. And I want to show you exactly how to do it.
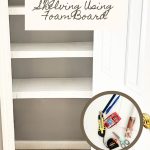
DIY Wire Shelf Covers with Foam Board
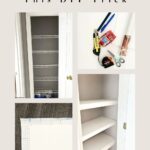
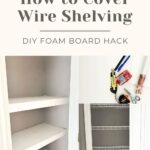
Materials & Tools Needed
- Foam Board (you can grab them at a local dollar store or get foam board on Amazon, but they are slightly more expensive.
- Packing Tape or White duck Tape
- Box Cutter (or anything with a shard edge like a knife or scissors)
- Peel and Stick Contact Paper or Wall Paper
- Measuring Tape
- Pencil

Most of the supplies needed for this DIY project can be purchased at the dollar store or online. Once you have all your materials and necessary supplies, you’re ready to start transforming your wire shelves!
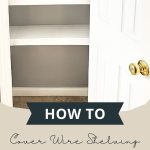
How to Make Wire Shelf Covers with Foam Board
Step 1 – Empty the Closet
Remove all items on top of the wire shelf in the closet to make space for the new shelf covers. An empty closet will make it easier to insert the shelf covers and reorganize it.

Step 2 – Measure your shelves
The first thing you must do when creating your DIY wire shelf covers is measure the shelves in the closet. Measure the length, width and edge (the lip) of the shelves with a measuring tape.
My closet measured 36 inches wide and 12 inches long. The foam board measured 20″x 30″. With this particular foam board, I would need two pieces of foam core board.
Be sure to measure a couple of times to ensure you have the exact measurements. This first step is crucial because the last thing you want is to cut the foam board, only to find out it doesn’t fit. So make sure you have the correct dimensions before proceeding to the next steps.
Step 3 – Outline the Foam Board
Once you have the measurements for the shelves, it is time to outline the foam board, then cut it. Mark the foam board with the measurements of the shelves with a pencil. This outline will help make the foam board easier to cut.
Since the foam board was shorter than the longest side of the shelf, I outlined another shorter piece of the board to help increase the length of the closet.
The extra piece is not necessary if your closet is the same size or shorter than the width of the foam board.
Step 4 – Cut the Foam Board
Cut the foam board using the outline that you created.

The trick here is to cut the lip or edge of the foam board half way and leave the edges still connected. Doing this allows you to bend the front piece without the need for extra supplies when it’s time to apply the contact paper.
Step 5 – Connect the Foam Board pieces
Use clear packing tape to connect the two pieces of foam board to increase its length.

This step may not be required if your closet is the same size or shorter than the width of the original foam board.
Step 6 – Cover the Foam Board with Contact Paper
It’s time to cover the foam board with contact paper.
Take the Foam Board and lay it over the contact paper. Use a scissor to cut the contact paper to conform around the board. I’d recommend cutting at least 2-3 inches extra of contact paper on each side to wrap around the contact board.

Apply the contact paper to the foam board and smooth out any wrinkles or bubbles as you go along to ensure a clean and polished look.
Bend the lip of the foam board before wrapping it entirely with the contact paper.
Repeat this process for every single wire shelf until all your wire shelves are covered.
Step 7 – Insert the foam shelves in closet
It is time to insert the wire cover on top of the shelf. Repeat the process for each shelf throughout the linen closet.

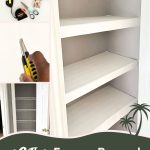
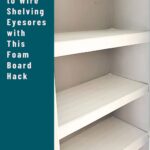
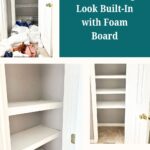
What a difference this simple project made. No more old wire shelving. Now you can decorate and organize your newly upgraded shelves.

This stunning hack not only looks great, but it provides a functional solution for hiding clutter and creating a more cohesive look in your space. While these covers are not entirely high end like wood shelves, they give the closet a custom look.
If you are on a tight budget and strapped for time, this is a great way to update and refresh a closet – adding functionality and style.
This wire shelving hack can be done on any wire shelf unit – from the kid’s closet and pantry closets to the laundry room closets. And just about anyone at all skill levels can do it.
To get a wood shelving appearance, you can substitute the contact paper or wallpaper’s design color with ones that resemble wood like this contact paper.
Other DIY and Makeover Ideas you might also like:
- Budget Friendly Snack Pantry Ideas for the Entire Family
- 12 Renter Friendly Bathroom Makeover Ideas
- 15 Easy Home Makeover Ideas You Can Do on A Tight Budget
Please comment below to let me know what you think of these DIY wire shelf covers. Follow me on social media – Pinterest and Instagram or subscribe to my mailing list for other design inspiration, home improvement, and DIY projects.
Happy organizing!

DIY Foam Board Hack
Materials
- Foam Board (you can grab them at a local dollar store or get foam board on Amazon, but they are slightly more expensive.
- Packing Tape or White duck Tape
- Box Cutter (or anything with a shard edge like a knife or scissors)
- Peel and Stick Contact Paper or Wall Paper
- Measuring Tape
- Pencil
Instructions
- Empty the ClosetRemove all items on top of the wire shelf in the closet to make space for the new shelf covers. An empty closet will make it easier to insert the shelf covers and reorganize it.
- Measure your shelvesThe first thing you must do when creating your DIY wire shelf covers is measure the shelves in the closet. Measure the length, width and edge (the lip) of the shelves with a measuring tape.My closet measured 36 inches wide and 12 inches long. The foam board measured 20″x 30″. With this particular foam board, I would need two pieces of foam core board.Be sure to measure a couple of times to ensure you have the exact measurements. This first step is crucial because the last thing you want is to cut the foam board, only to find out it doesn’t fit. So make sure you have the correct dimensions before proceeding to the next steps.
- Outline the Foam BoardOnce you have the measurements for the shelves, it is time to outline the foam board, then cut it. Mark the foam board with the measurements of the shelves with a pencil. This outline will help make the foam board easier to cut.Since the foam board was shorter than the longest side of the shelf, I outlined another shorter piece of the board to help increase the length of the closet.The extra piece is not necessary if your closet is the same size or shorter than the width of the foam board.
- Cut the Foam BoardCut the foam board using the outline that you created.The trick here is to cut the lip or edge of the foam board half way and leave the edges still connected. Doing this allows you to bend the front piece without the need for extra supplies when it’s time to apply the contact paper.
- Connect the Foam Board piecesUse clear packing tape to connect the two pieces of foam board to increase its length.This step may not be required if your closet is the same size or shorter than the width of the original foam board.
- Cover the Foam Board with Contact PaperIt’s time to cover the foam board with contact paper.Take the Foam Board and lay it over the contact paper. Use a scissor to cut the contact paper to conform around the board. I’d recommend cutting at least 2-3 inches extra of contact paper on each side to wrap around the contact board.Apply the contact paper to the foam board and smooth out any wrinkles or bubbles as you go along to ensure a clean and polished look.Bend the lip of the foam board before wrapping it entirely with the contact paper.Repeat this process for every single wire shelf until all your wire shelves are covered.
- Insert the foam shelves in closetIt is time to insert the wire cover on top of the shelf. Repeat the process for each shelf throughout the linen closet.