This post may contain affiliate links.


Painting your nightstand is a great way to revitalize and transform it into a usable and functional piece of furniture. It is also a cost-effective and affordable way to take an old furniture piece and give it a new life. You can easily create an attractive work of art with a fresh coat of paint.
However, painting a laminate nightstand can be tricky, as these materials have non-porous surfaces that make it difficult for paint to adhere to.
If not done properly, the paint can scuff and chip off instantly on a piece of laminate furniture. But with the right materials, preparation, and techniques, you can give your nightstand a stunning fresh new look.
Follow along as I share how to paint a laminate nightstand with this easy step-by-step tutorial.

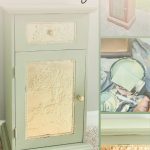
Nightstand Before Painting
Here’s a look at the nightstand before it was painted. This nightstand was purchased at a local Goodwill thrift store for $7. I needed a new nightstand for a spare bedroom, and this side table seemed ideal.

Supplies & Materials
- Rust-Oleum Oil Based Primer
- Paint
- Paintbrush
- Screwdriver
- Foam Roller
- Drop Cloth or Cardboard
- Sandpaper
- Dish Soap
- Wood Filler
- Putty Knife
- Optional: Hardware (These knobs fit most nightstand styles)
- Optional: Spray Paint (Rust-Oleum metallic gold spray paint was used in this DIY project)
Once you have all your supplies, you’re ready to get started!

Step 1 – Prep the Nightstand
The first step in preparing the nightstand for painting is to remove all the hardware, drawers, and doors from the nightstand. If it is good salvageable hardware, you don’t want to accidentally get any paint on it.

Once all the hardware has been removed, clean up the nightstand by wiping it down with a damp rag. If it’s really dirty, add some dawn soap to some water to create soapy water and use it to wipe down the nightstand.
This should remove any dirt and dust from the nightstand. You want to have a clean slate to paint the nightstand.
Pro Tip – If your nightstand has chips, cracks, or old holes, you can easily repair it with wood filler. Wood filler will remove any imperfections and deep scratches on an old piece of furniture. Thankfully, the nightstand was in pretty good shape and did not need any filling.
Step 2 – Sand the Nightstand

As messy as sanding is, it is an important step in the painting process. The process involves sanding down the surfaces of the nightstand to allow the primer and paint to hold best to the nightstand’s surface.
For sanding, use medium grit sandpaper to sand the surface gently. You can also use an orbital sander if you have one in your arsenal.
Once you’ve sanded the nightstand, wipe it down with a damp cloth to remove any sanding dust or debris left behind. Allow it to dry.
Step 3 – Prime Your Nightstand.

After sanding your nightstand, it’s time to prime it. The primer provides a smooth surface for the paint to go on. Use an oil-based primer that is specifically designed for wood surfaces.
Apply the primer evenly with a brush or foam roller, making sure to cover all areas of the nightstand. Allow the primer to dry completely before moving on to the next step.
I recommend being in a well-ventilated area before priming and painting. Allow the primer to dry before applying the paint. If you don’t allow it to dry sufficiently, the second coat may pull off the first coat of paint.
Step 4 – Paint Your Nightstand.

Once the primer is dry, apply the paint to the nightstand using a paintbrush or roller. If you use a roller, make sure to go back and use a paintbrush to get the creases and crevices of the nightstand that the roller can’t reach. Then let it dry.
Step 5 – Apply the Second Coat of Paint

For best results, I applied two coats of paint after the first coat completely dried. The second coat helped ensure the paint was evenly distributed with no visible brush strokes and a smooth finish. It also made sure that the color was consistent across the entire surface.
Depending on the kind of paint and paint color you use, you may need to apply a third coat for optimal coverage and durability.
Step 7 – Refinish and Affix Hardware
The final step was to put back on the hardware. Before I did that, I kept the original knobs but used a can of spray paint to refinish the knobs as well as spray-painted a portion of the door and drawer with the same gold paint. This helped give the hardware a fresh new look.

Once the hardware was dry, I put it back onto the nightstand to finish the look.

The Finale – Nightstand Makeover
And that should do it. It’s amazing what a fresh coat of paint can do! I now have a beautiful piece of bedroom furniture ready to use in my spare guest room.

Optional Step – If you want to give your nightstand an added layer of protection, it may be a good idea to use wax for wood furniture.
While applying wax is not mandatory, it will give your nightstand a bit more pizazz and protect it for years to come. This finishing wax is an excellent option.

What is Laminate?
Laminate is a wood-like product made from a thin layer of printed plastic to a substrate of plywood or particle board. Laminate appears a bit shiny and does not have a porous surface, so it’s harder to get paint to stick to it.
How do you fill in cracks and chips on the furniture?
Wood filler or putty is an excellent way to fill in cracks and chips on any piece of wood furniture. Apply the filler with a putty knife, filling the crack and holes. Allow the filler to dry completely before sanding and painting.
What is the best paint for laminate furniture?
The kind of paint you use to paint pieces of furniture like an old dresser or vintage nightstand matters greatly. You want to use paint that will hold up over time, not strip, and go on smoothly.
That said, the best type of paint for painting furniture is either acrylic paint, chalk paint, or mineral paint. These paints are durable, easy to clean, and come in various colors.
Chalk paint is most highly recommended for furniture painting as it needs very little prep work, is easy to use, and finishes smoothly.
What are the benefits of re-painting furniture?
Painting furniture is a great way to give old furniture new life and new purpose. It is a way to add value to an old piece of furniture and create a higher-quality product.
Almost any old furniture can be repurposed with a creative eye and a little paint. It allows you to save some money and serves as an alternative to buying expensive quality furniture.
If nothing else, it is a great way to positively impact the environment by helping to reduce waste.
Where can you find used furniture?
Use furniture can easily be found at a local thrift store. Thrift stores such as Goodwill Industries, The Salvation Army, and Value Village are great places to find furniture, including used nightstands, side tables, and possibly vintage dressers. You can also visit the local antique shop, flea market, or garage sales.
If all else fails, keep an eye out in your neighborhood for donated and unwanted treasures on the side of the road. With all these options, you may be able to find exactly what you are looking for.
So, what do you think of this nightstand makeover? Leave a note below with your thoughts or comments about the new side table.
More DIY projects you might like:
- How to Paint a Vase with Acrylic Paint to Look Expensive
- How to DIY a Farmhouse Rustic Coat Rack
- How to Upcycle Vintage Suitcase into a Nightstand
Feel free also to follow me on my social media pages – Pinterest and Instagram or subscribe to my mailing list for other design inspiration and home decor ideas.
Tamara White is the creator and founder of The Thrifty Apartment, a home decor and DIY blog that focuses on affordable and budget-friendly home decorating ideas and projects. Tamara documents her home improvement journey, love of thrifting, tips for space optimization, and creating beautiful spaces.
- Tamara White
- Tamara White
- Tamara White
- Tamara White
- Tamara White
- Tamara White
- Tamara White
- Tamara White
- Tamara White
- Tamara White
- Tamara White
- Tamara White
- Tamara White
- Tamara White
- Tamara White
- Tamara White
- Tamara White
- Tamara White
- Tamara White
- Tamara White
- Tamara White
- Tamara White
- Tamara White
- Tamara White
- Tamara White
- Tamara White
- Tamara White
- Tamara White
- Tamara White
- Tamara White
- Tamara White
- Tamara White
- Tamara White
- Tamara White
- Tamara White
- Tamara White
- Tamara White
- Tamara White
- Tamara White
- Tamara White
- Tamara White
- Tamara White
- Tamara White
- Tamara White
- Tamara White
- Tamara White
- Tamara White
- Tamara White
- Tamara White
- Tamara White
- Tamara White
- Tamara White
- Tamara White
- Tamara White
- Tamara White
- Tamara White
- Tamara White
- Tamara White
- Tamara White
- Tamara White
- Tamara White
- Tamara White
- Tamara White
- Tamara White
- Tamara White
- Tamara White
- Tamara White
- Tamara White
- Tamara White
- Tamara White
- Tamara White
- Tamara White
- Tamara White
- Tamara White
- Tamara White
- Tamara White
- Tamara White
- Tamara White
- Tamara White
- Tamara White
- Tamara White
- Tamara White
- Tamara White
- Tamara White
- Tamara White
- Tamara White
- Tamara White
- Tamara White
- Tamara White
- Tamara White
- Tamara White
- Tamara White
- Tamara White
- Tamara White
- Tamara White
- Tamara White
- Tamara White
- Tamara White
- Tamara White
- Tamara White
- Tamara White
- Tamara White
- Tamara White
- Tamara White
- Tamara White
- Tamara White
- Tamara White
- Tamara White
- Tamara White
- Tamara White
- Tamara White
- Tamara White
- Tamara White
- Tamara White
- Tamara White
- Tamara White
- Tamara White
- Tamara White
- Tamara White
- Tamara White
- Tamara White
- Tamara White
- Tamara White
- Tamara White
- Tamara White
- Tamara White
- Tamara White
- Tamara White
- Tamara White
- Tamara White
- Tamara White
- Tamara White
- Tamara White
- Tamara White
- Tamara White
- Tamara White
- Tamara White
- Tamara White
- Tamara White
- Tamara White
- Tamara White
- Tamara White
- Tamara White
- Tamara White
- Tamara White
- Tamara White
- Tamara White
- Tamara White
- Tamara White
- Tamara White
- Tamara White
- Tamara White
- Tamara White
- Tamara White
- Tamara White
- Tamara White
- Tamara White
- Tamara White
- Tamara White
- Tamara White
- Tamara White
- Tamara White
- Tamara White
- Tamara White
- Tamara White
- Tamara White
- Tamara White
- Tamara White
- Tamara White
- Tamara White
- Tamara White
- Tamara White
- Tamara White
- Tamara White
- Tamara White
- Tamara White
- Tamara White
- Tamara White
- Tamara White
- Tamara White
- Tamara White
- Tamara White
- Tamara White
- Tamara White
- Tamara White
- Tamara White
- Tamara White
- Tamara White
- Tamara White
- Tamara White
- Tamara White
- Tamara White
- Tamara White
- Tamara White
- Tamara White
- Tamara White
- Tamara White
- Tamara White
- Tamara White
- Tamara White
- Tamara White
- Tamara White
- Tamara White
- Tamara White
- Tamara White
- Tamara White
- Tamara White
- Tamara White
- Tamara White
- Tamara White
- Tamara White
- Tamara White
- Tamara White
- Tamara White
- Tamara White
- Tamara White
- Tamara White
- Tamara White
- Tamara White
- Tamara White
- Tamara White
- Tamara White
- Tamara White
- Tamara White
- Tamara White
- Tamara White
- Tamara White
- Tamara White