Get ready to fall in love with these adorable heart-shaped paper crafts! Perfect for adding a touch of cuteness to your home or desk. They also make wonderful decorations for special occasions like Valentine’s Day, adding a sweet, personal touch to your celebration. Whether you use them to create garlands, gift tags, or table centerpieces, these paper hearts are delightful.
This project is great for all ages, especially for kids, as it’s not only fun but also helps them develop fine motor skills through cutting, folding, and gluing. Spend quality time together crafting these simple yet beautiful paper flowers, and enjoy the creative process as much as the result. Here’s how to get started!

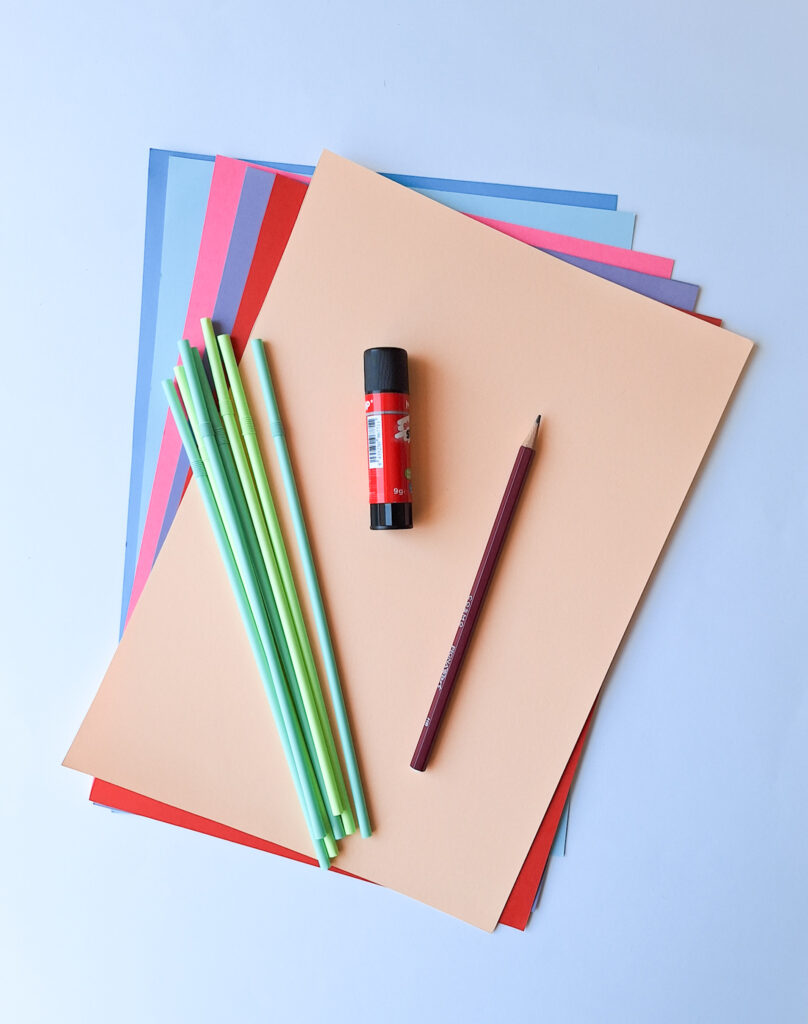
Supplies
- colored paper craft
- glue
- scissor
- straw
- pencil
Instructions: How to Make Heart Paper Flowers
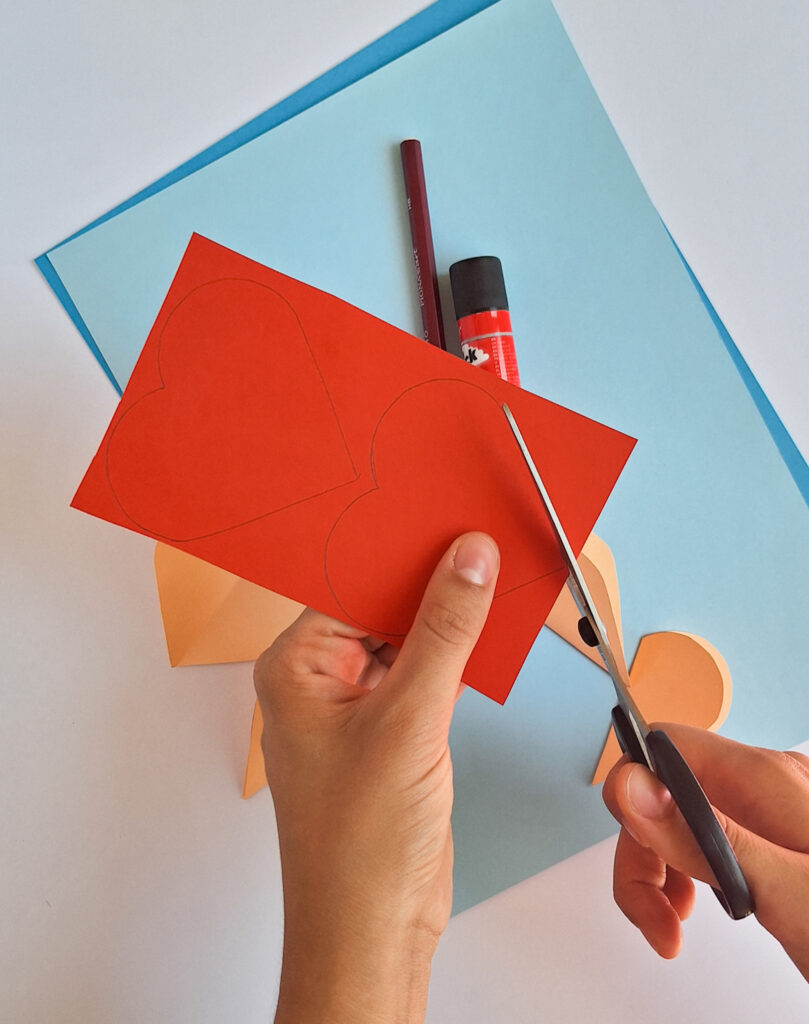
Step 1: Use the templates provided to cut out ten (10) hearts for each flower. Five of the hearts should be in one color, while the remaining five should be in a different color.
Step 2: Once the hearts are cut out, fold each one in half. These will form the petals of the flower.
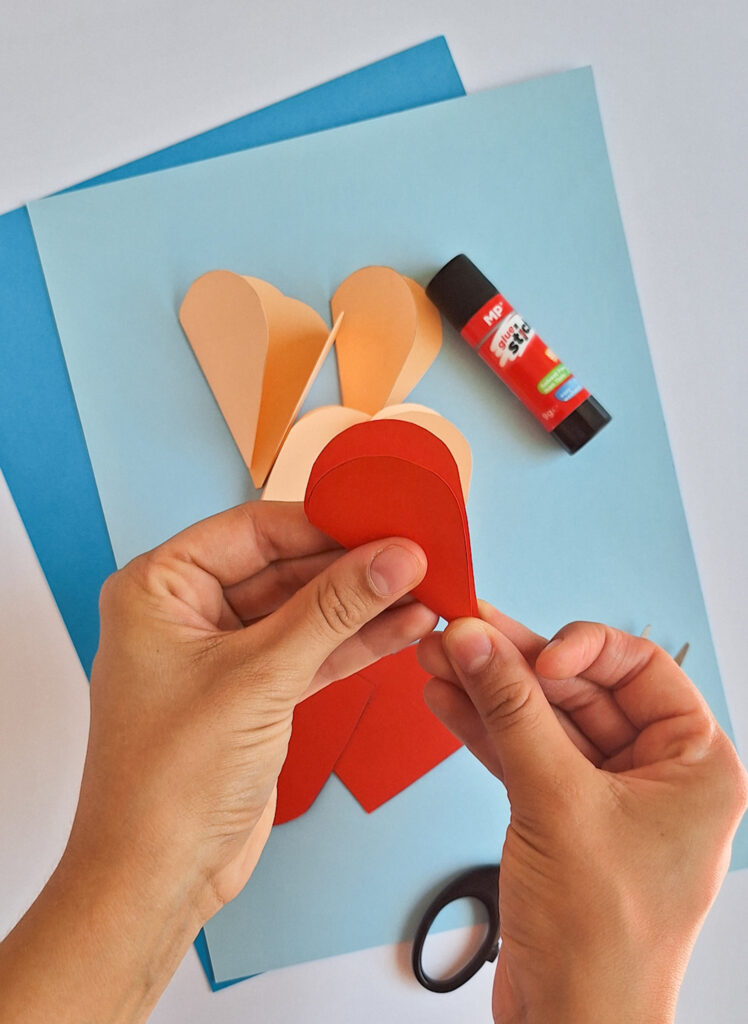
Step 3: Glue the halves of the hearts together, alternating the colors.
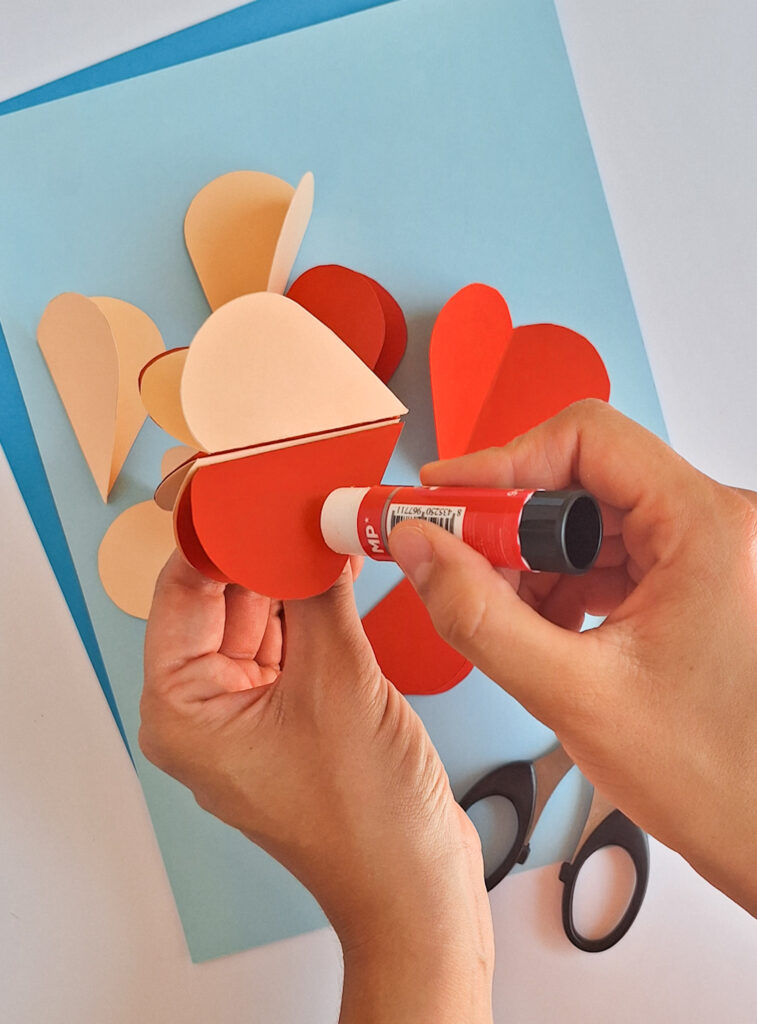
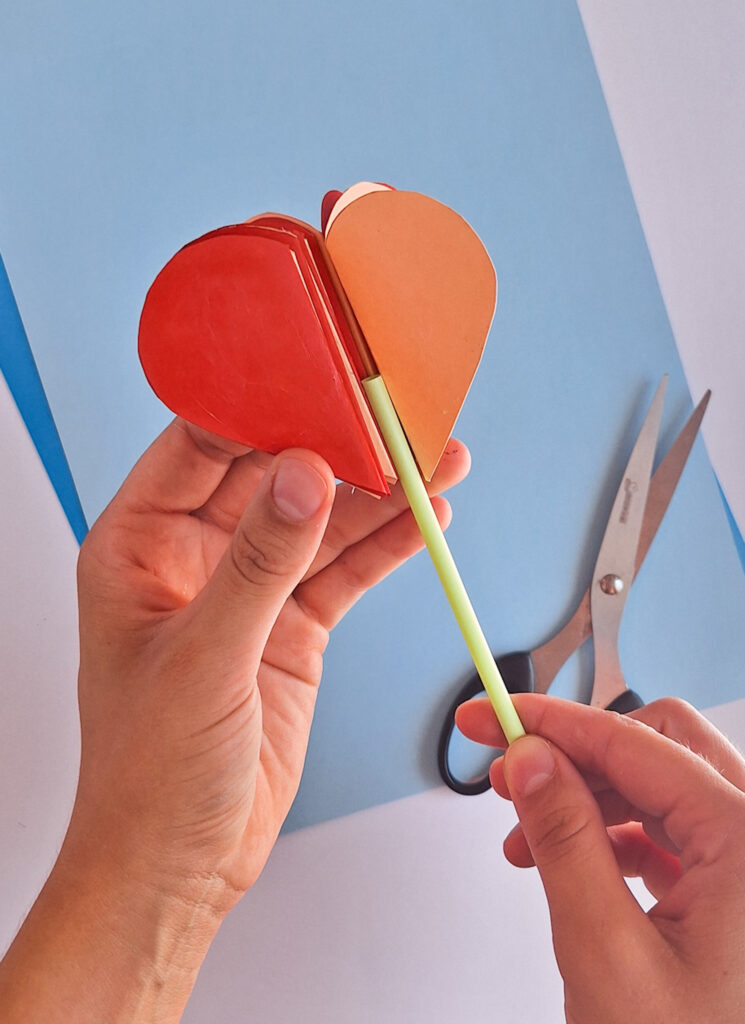
Step 4: Before gluing on the last heart, insert the straw into the center, then close the flower with the straw in place.
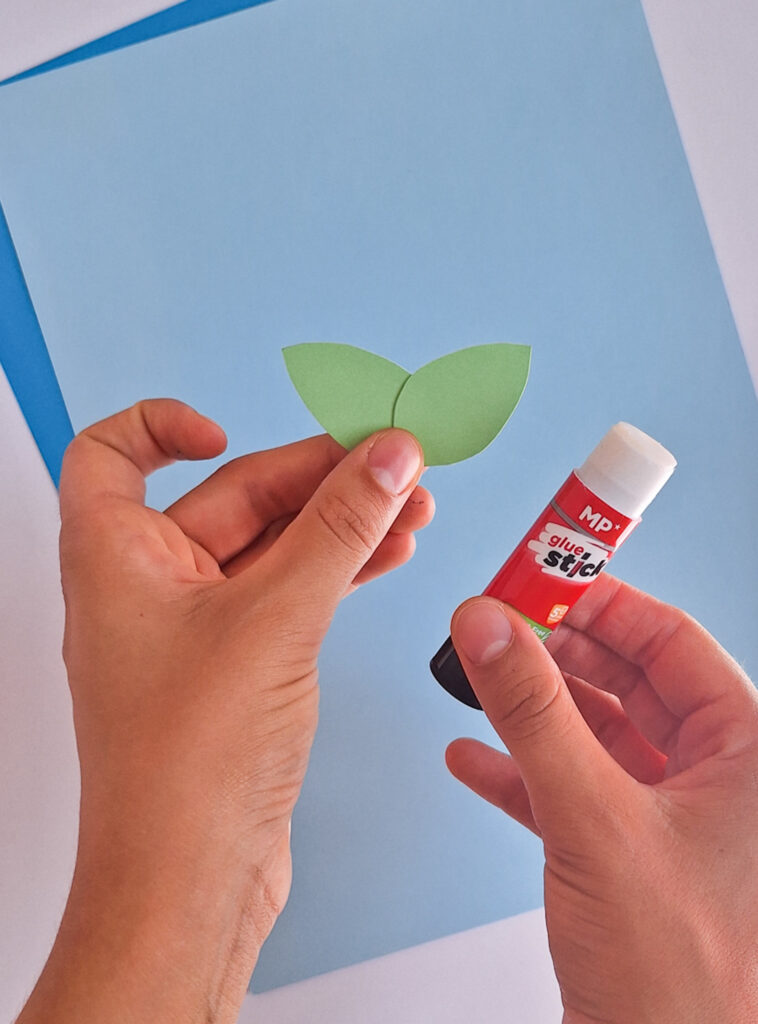
Step 5: Using the templates again, cut out as many leaves as you need. Glue the leaves in pairs and attach them to the straw.
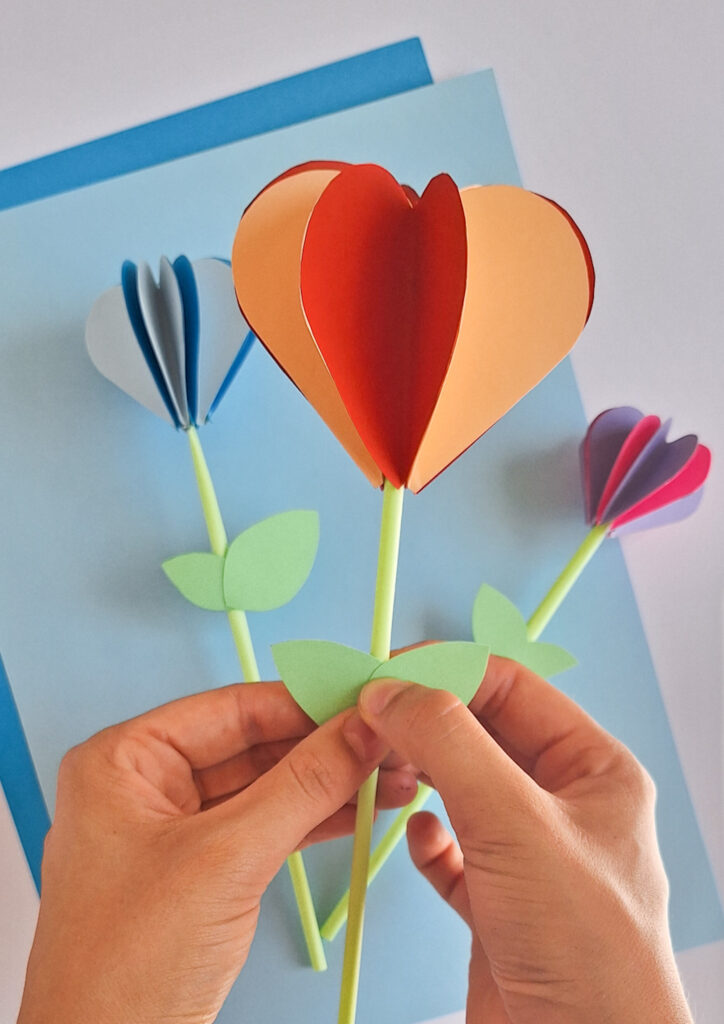
And that’s it. You will now have your paper hearts.


DIY Heart Paper Flowers
Materials
- Colored Paper Craft
- Glue
- Scissor
- Straw
- Pencil
Instructions
- Use the templates provided to cut out ten (10) hearts for each flower. Five of the hearts should be in one color, while the remaining five should be in a different color.
- Once the hearts are cut out, fold each one in half. These will form the petals of the flower.
- Glue the halves of the hearts together, alternating the colors.
- Before gluing on the last heart, insert the straw into the center, then close the flower with the straw in place.
- Using the templates again, cut out as many leaves as you need. Glue the leaves in pairs and attach them to the straw.
Other Posts You Might Like
- Crafts with Rocks or Pebbles the Family Will Enjoy Making
- 15 Crafty Ways to Upcycle Your Old Wine Bottles
- Upcycle Your Wine Corks with These 15 Creative Craft Ideas
- 16 Lovely DIY Crafts That Will Transform Your Backyard Space
- 15 Unique Pine Cone Projects You Haven’t Seen Before
Tamara White is the creator and founder of The Thrifty Apartment, a home decor and DIY blog that focuses on affordable and budget-friendly home decorating ideas and projects. Tamara documents her home improvement journey, love of thrifting, tips for space optimization, and creating beautiful spaces.
- Tamara White
- Tamara White
- Tamara White
- Tamara White
- Tamara White
- Tamara White
- Tamara White
- Tamara White
- Tamara White
- Tamara White
- Tamara White
- Tamara White
- Tamara White
- Tamara White
- Tamara White
- Tamara White
- Tamara White
- Tamara White
- Tamara White
- Tamara White
- Tamara White
- Tamara White
- Tamara White
- Tamara White
- Tamara White
- Tamara White
- Tamara White
- Tamara White
- Tamara White
- Tamara White
- Tamara White
- Tamara White
- Tamara White
- Tamara White
- Tamara White
- Tamara White
- Tamara White
- Tamara White
- Tamara White
- Tamara White
- Tamara White
- Tamara White
- Tamara White
- Tamara White
- Tamara White
- Tamara White
- Tamara White
- Tamara White
- Tamara White
- Tamara White
- Tamara White
- Tamara White
- Tamara White
- Tamara White
- Tamara White
- Tamara White
- Tamara White
- Tamara White
- Tamara White
- Tamara White
- Tamara White
- Tamara White
- Tamara White
- Tamara White
- Tamara White
- Tamara White
- Tamara White
- Tamara White
- Tamara White
- Tamara White
- Tamara White
- Tamara White
- Tamara White
- Tamara White
- Tamara White
- Tamara White
- Tamara White
- Tamara White
- Tamara White
- Tamara White
- Tamara White
- Tamara White
- Tamara White
- Tamara White
- Tamara White
- Tamara White
- Tamara White
- Tamara White
- Tamara White
- Tamara White
- Tamara White
- Tamara White
- Tamara White
- Tamara White
- Tamara White
- Tamara White
- Tamara White
- Tamara White
- Tamara White
- Tamara White
- Tamara White
- Tamara White
- Tamara White
- Tamara White
- Tamara White
- Tamara White
- Tamara White
- Tamara White
- Tamara White
- Tamara White
- Tamara White
- Tamara White
- Tamara White
- Tamara White
- Tamara White
- Tamara White
- Tamara White
- Tamara White
- Tamara White
- Tamara White
- Tamara White
- Tamara White
- Tamara White
- Tamara White
- Tamara White
- Tamara White
- Tamara White
- Tamara White
- Tamara White
- Tamara White
- Tamara White
- Tamara White
- Tamara White
- Tamara White
- Tamara White
- Tamara White
- Tamara White
- Tamara White
- Tamara White
- Tamara White
- Tamara White
- Tamara White
- Tamara White
- Tamara White
- Tamara White
- Tamara White
- Tamara White
- Tamara White
- Tamara White
- Tamara White
- Tamara White
- Tamara White
- Tamara White
- Tamara White
- Tamara White
- Tamara White
- Tamara White
- Tamara White
- Tamara White
- Tamara White
- Tamara White
- Tamara White
- Tamara White
- Tamara White
- Tamara White
- Tamara White
- Tamara White
- Tamara White
- Tamara White
- Tamara White
- Tamara White
- Tamara White
- Tamara White
- Tamara White
- Tamara White
- Tamara White
- Tamara White
- Tamara White
- Tamara White
- Tamara White
- Tamara White
- Tamara White
- Tamara White
- Tamara White
- Tamara White
- Tamara White
- Tamara White
- Tamara White
- Tamara White
- Tamara White
- Tamara White
- Tamara White
- Tamara White
- Tamara White
- Tamara White
- Tamara White
- Tamara White
- Tamara White
- Tamara White
- Tamara White
- Tamara White
- Tamara White
- Tamara White
- Tamara White
- Tamara White
- Tamara White
- Tamara White
- Tamara White
- Tamara White
- Tamara White
- Tamara White
- Tamara White
- Tamara White
- Tamara White
- Tamara White
- Tamara White
- Tamara White
- Tamara White
- Tamara White
- Tamara White
- Tamara White
- Tamara White
- Tamara White
- Tamara White
- Tamara White
- Tamara White
- Tamara White
- Tamara White
- Tamara White
- Tamara White
- Tamara White
- Tamara White
- Tamara White
- Tamara White
- Tamara White
- Tamara White
- Tamara White
- Tamara White
- Tamara White