This post may contain affiliate links.


A traditional Christmas wreath makes a beautiful addition to a home during the holidays. They are timeless holiday decor. Wreaths are a stylish yet simple way to add to your home decor during the holiday season, whether on the front door or above the fireplace.
However, as beautiful as it is, a traditional holiday wreath can be quite expensive. So why buy one when you can make your own wreath?
The good news is that wreaths are very simple to make. You’ll need simple materials and real greenery to complete your DIY Christmas decor.
Follow along as I share how to create a traditional Christmas wreath this holiday season with this quick and easy step-by-step guide.

How to DIY Christmas Wreath
Christmas Wreath Supplies and Materials Needed
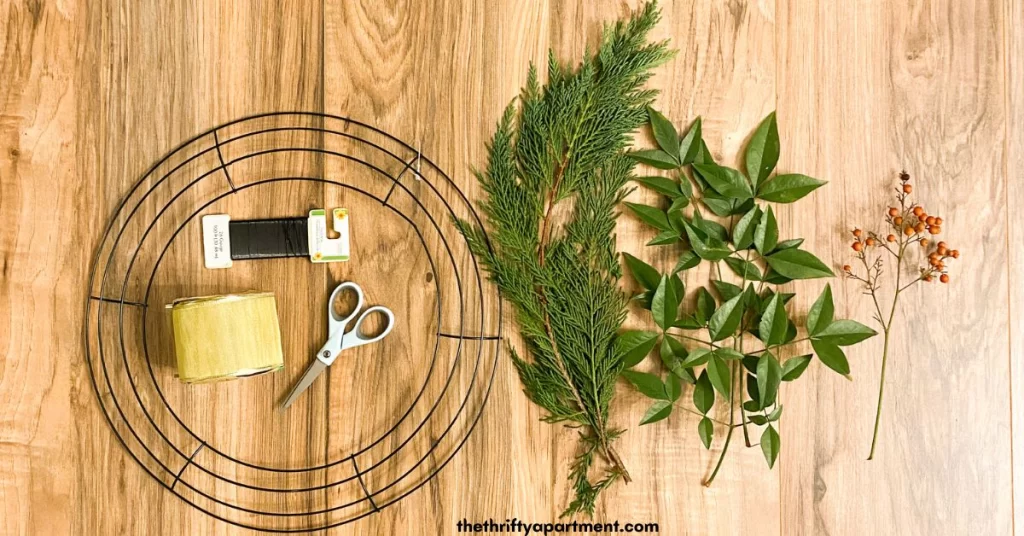
- Wreath Ring – I went with a 14″ wreath ring.
- Florist Wire
- Greenery – Crafting a classic winter wreath traditionally involves using evergreens like conifers, boxwood, holly, eucalyptus, or rosemary. In my creation, I opted for conifer sprigs and heavenly bamboo.
- Decorative floral accent pieces – To add a touch of festive flair, incorporate decorative floral accents such as vibrant berries, holly, dried orange slices, or pine cones.
- Scissors
- Optional – Ribbons
You can grab most of the craft supplies at the dollar store or local craft stores.
Step 1 – Gather your greenery.
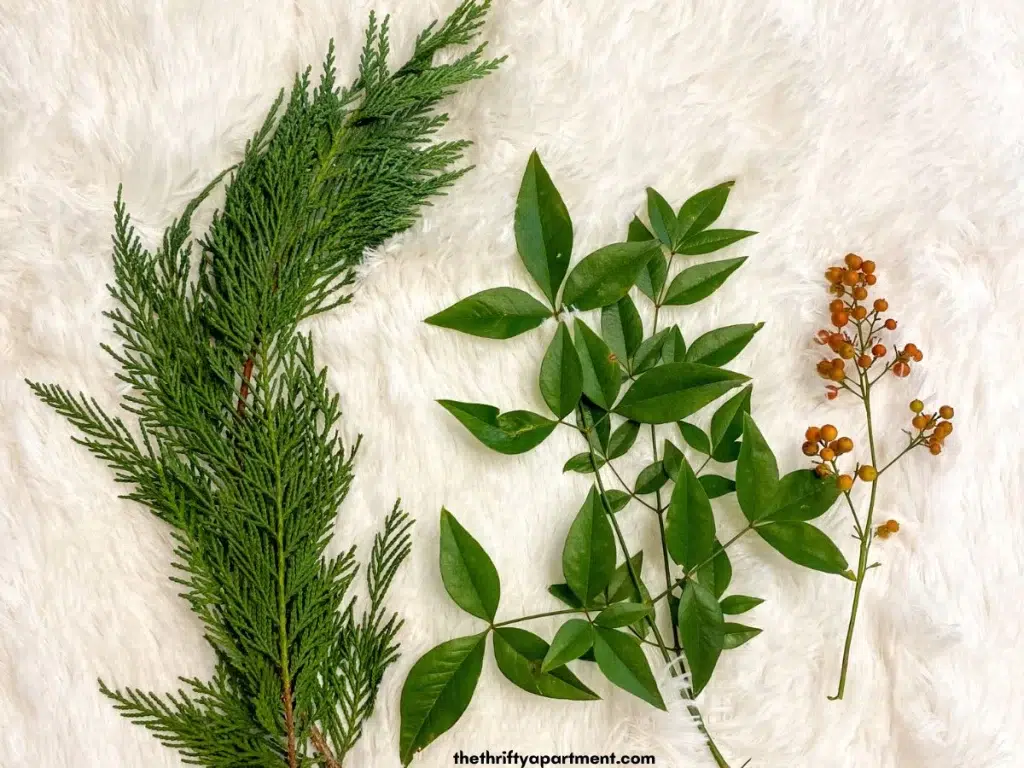
Wreath-like plant materials are abundant in the fall or winter, especially in your backyard. You’d be amazed at what you can find in your backyard.
I found traditional evergreen branches like Conifer, heavenly bamboo, and berries. So, shop around, go foraging in your yard, and see what you can find.
And if you’re not in an area where you can forage, you can source greenery from a local tree farm, nursery, garden, or park to find what you’re looking for. Mix and match the varying foliage.
Step 2 – Cut your greenery.
Cut individual pieces of greenery – varying lengths and pieces (about 6-14″ long). Leave room for imperfections with your fresh-cut greens.
Once done, please place similar pieces grouped in piles. This will be helpful once you begin crafting the festive wreath.
Step 3 – Position the greenery onto the wreath ring.

Start by wrapping the bare wreath ring a few times with florist wire, ensuring it holds firmly in place to serve as the foundation for your homemade wreath.
Use the wire to attach the bunch of greenery to the base of the wreath ring. Overlap the next piece of greenery, layering it over the existing foliage to cover more of the wreath ring, and secure it with wire.
Repeat this process with additional foliage until the entire wreath ring is covered and firmly attached with floral wire.
For the last piece of greenery, lift the first set back, tuck the ends of the last bunch underneath, wrap the wreath a few more times with wire to secure it, and then cut the wire.
Step 4 – Add your decorative accent pieces to the natural wreath.
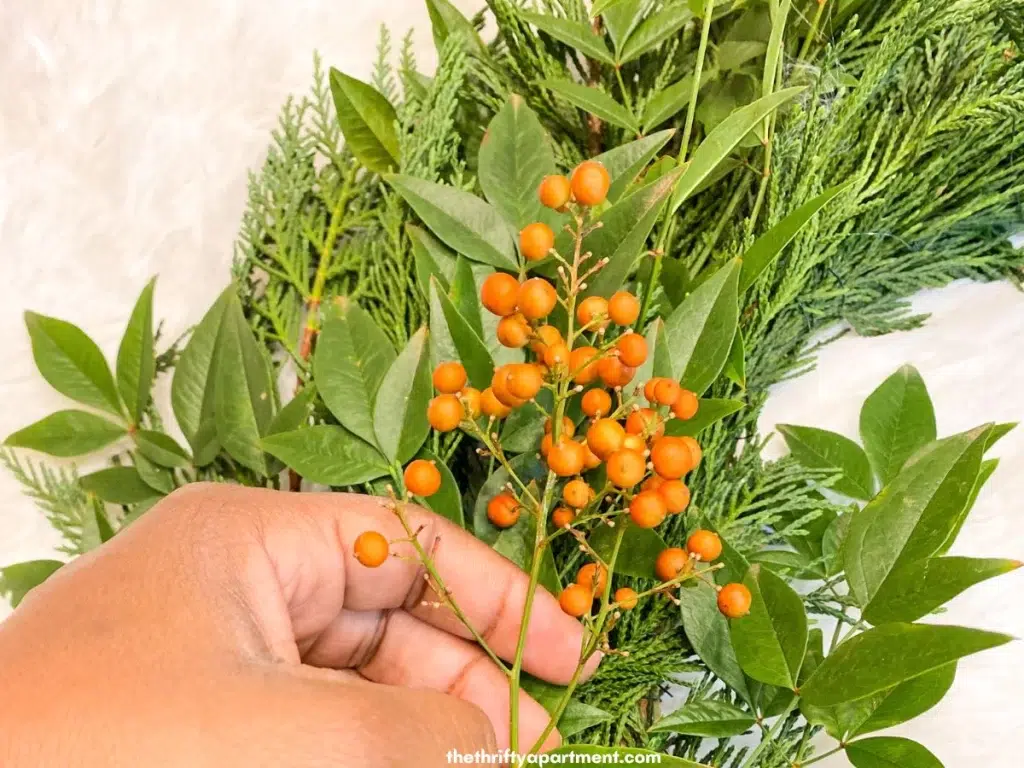
Next, let’s bring your natural Christmas wreath to life by incorporating accent pieces like berries. Grab a small piece of wire and wrap it securely around the stem of the decorative foliage.
Repeat this process for each accent foliage piece. Ensure that each style of foliage is evenly spaced around the wreath, creating a natural and balanced appearance. Keep adding more until you achieve the desired festive look.
Step 5 – Step back and inspect your wreath.

Now, give your wreath a thorough once-over to make sure it aligns with your vision. If you notice any branches sticking out, use additional florist wire to gently pull them into place.
You can also grab a pair of scissors to trim off any excess pieces that may be protruding or are too lengthy. This step allows you to add those final, meticulous touches to perfect your traditional Christmas wreath.
Step 6 – Hang the wreath.
I opted for a simple solution by using a dollar store hook to hang my wreath over the front door. Alternatively, you can take a piece of ribbon, loop it through the wreath, and create a makeshift hook for hanging your traditional Christmas wreath.
How long will the wreath last?
As this wreath is made from live greenery, its lifespan typically ranges from a few days to a few weeks, extending well beyond the holiday season. The duration will be influenced by factors such as weather conditions, maintenance, and whether it’s hung indoors or outdoors.
For indoor display, it’s essential to mist the wreath lightly every few days to prevent it from drying out. To preserve the freshness of any greenery, regular spritzing with water is advised, and it’s advisable to keep it in a cool location.
Conclusion
I hope you enjoyed this simple project. Now that you have experienced just how easy it is to make your own DIY Christmas Wreath, I’m sure this will become a new holiday tradition.
Other posts you might like:
- 16 Best Christmas Gift Ideas for Her
- For The Pet Lovers: 15 Gift Ideas Under $100
- How to Make a Christmas Pillow
- How to Make a Christmas Mantel Garland
- DIY Secret Santa gift basket ideas
Feel free also to follow me on my social media pages – Pinterest and Instagram or subscribe to my mailing list for other design inspiration and home decor ideas.
Merry Christmas and Happy New Year!
Tamara White is the creator and founder of The Thrifty Apartment, a home decor and DIY blog that focuses on affordable and budget-friendly home decorating ideas and projects. Tamara documents her home improvement journey, love of thrifting, tips for space optimization, and creating beautiful spaces.
- Tamara White
- Tamara White
- Tamara White
- Tamara White
- Tamara White
- Tamara White
- Tamara White
- Tamara White
- Tamara White
- Tamara White
- Tamara White
- Tamara White
- Tamara White
- Tamara White
- Tamara White
- Tamara White
- Tamara White
- Tamara White
- Tamara White
- Tamara White
- Tamara White
- Tamara White
- Tamara White
- Tamara White
- Tamara White
- Tamara White
- Tamara White
- Tamara White
- Tamara White
- Tamara White
- Tamara White
- Tamara White
- Tamara White
- Tamara White
- Tamara White
- Tamara White
- Tamara White
- Tamara White
- Tamara White
- Tamara White
- Tamara White
- Tamara White
- Tamara White
- Tamara White
- Tamara White
- Tamara White
- Tamara White
- Tamara White
- Tamara White
- Tamara White
- Tamara White
- Tamara White
- Tamara White
- Tamara White
- Tamara White
- Tamara White
- Tamara White
- Tamara White
- Tamara White
- Tamara White
- Tamara White
- Tamara White
- Tamara White
- Tamara White
- Tamara White
- Tamara White
- Tamara White
- Tamara White
- Tamara White
- Tamara White
- Tamara White
- Tamara White
- Tamara White
- Tamara White
- Tamara White
- Tamara White
- Tamara White
- Tamara White
- Tamara White
- Tamara White
- Tamara White
- Tamara White
- Tamara White
- Tamara White
- Tamara White
- Tamara White
- Tamara White
- Tamara White
- Tamara White
- Tamara White
- Tamara White
- Tamara White
- Tamara White
- Tamara White
- Tamara White
- Tamara White
- Tamara White
- Tamara White
- Tamara White
- Tamara White
- Tamara White
- Tamara White
- Tamara White
- Tamara White
- Tamara White
- Tamara White
- Tamara White
- Tamara White
- Tamara White
- Tamara White
- Tamara White
- Tamara White
- Tamara White
- Tamara White
- Tamara White
- Tamara White
- Tamara White
- Tamara White
- Tamara White
- Tamara White
- Tamara White
- Tamara White
- Tamara White
- Tamara White
- Tamara White
- Tamara White
- Tamara White
- Tamara White
- Tamara White
- Tamara White
- Tamara White
- Tamara White
- Tamara White
- Tamara White
- Tamara White
- Tamara White
- Tamara White
- Tamara White
- Tamara White
- Tamara White
- Tamara White
- Tamara White
- Tamara White
- Tamara White
- Tamara White
- Tamara White
- Tamara White
- Tamara White
- Tamara White
- Tamara White
- Tamara White
- Tamara White
- Tamara White
- Tamara White
- Tamara White
- Tamara White
- Tamara White
- Tamara White
- Tamara White
- Tamara White
- Tamara White
- Tamara White
- Tamara White
- Tamara White
- Tamara White
- Tamara White
- Tamara White
- Tamara White
- Tamara White
- Tamara White
- Tamara White
- Tamara White
- Tamara White
- Tamara White
- Tamara White
- Tamara White
- Tamara White
- Tamara White
- Tamara White
- Tamara White
- Tamara White
- Tamara White
- Tamara White
- Tamara White
- Tamara White
- Tamara White
- Tamara White
- Tamara White
- Tamara White
- Tamara White
- Tamara White
- Tamara White
- Tamara White
- Tamara White
- Tamara White
- Tamara White
- Tamara White
- Tamara White
- Tamara White
- Tamara White
- Tamara White
- Tamara White
- Tamara White
- Tamara White
- Tamara White
- Tamara White
- Tamara White
- Tamara White
- Tamara White
- Tamara White
- Tamara White
- Tamara White
- Tamara White
- Tamara White
- Tamara White
- Tamara White
- Tamara White
- Tamara White
- Tamara White
- Tamara White
- Tamara White
- Tamara White
- Tamara White
- Tamara White
- Tamara White
- Tamara White
- Tamara White
- Tamara White
- Tamara White
- Tamara White
- Tamara White