This post may contain affiliate links.


Simple crafts often make the biggest impression, and this paper flower wreath is no exception. It’s a charming way to decorate a kids’ room, playroom, or craft space while adding a pop of color and creativity. Best of all, it’s easy to make and perfect for involving the kids—even toddlers will enjoy helping out with this cheerful project.
This craft is both fun and functional, making it a great way to spend creative time together while adding a personal touch to your decor. Follow this guide to create your own paper flower wreath at home!

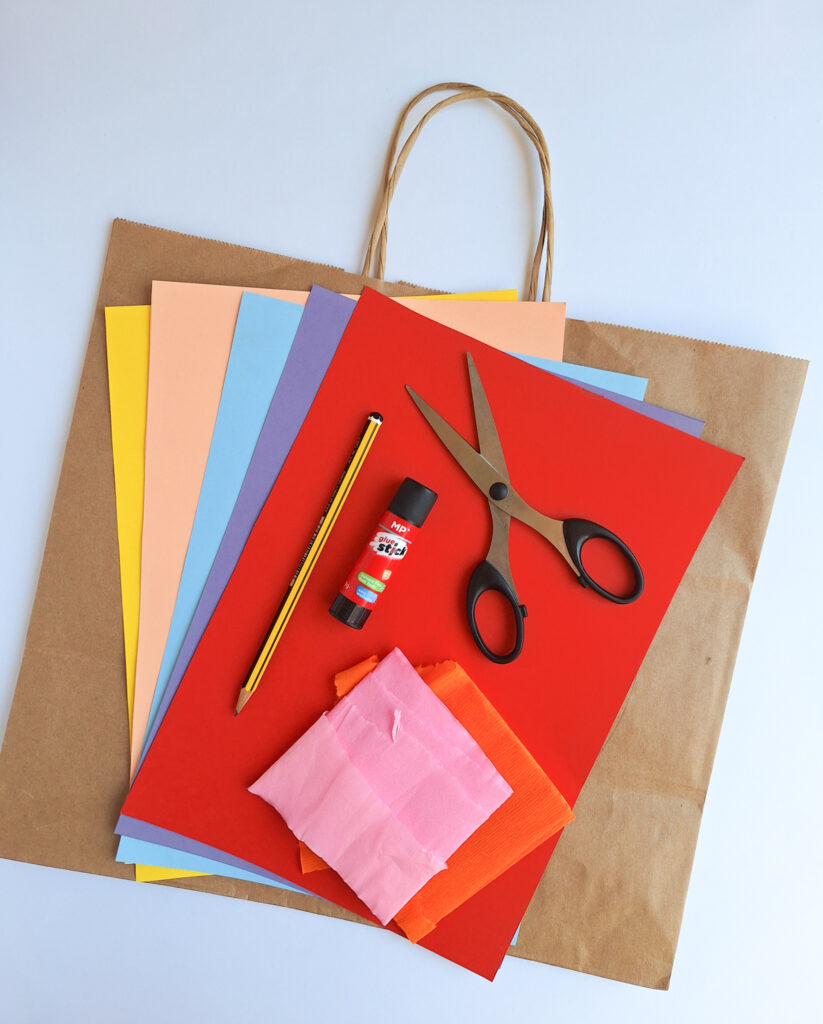
Supplies
- colored craft papers
- glue
- scissor
- pencil
- tissue paper
- recycled paper bag
Instructions
Step 1
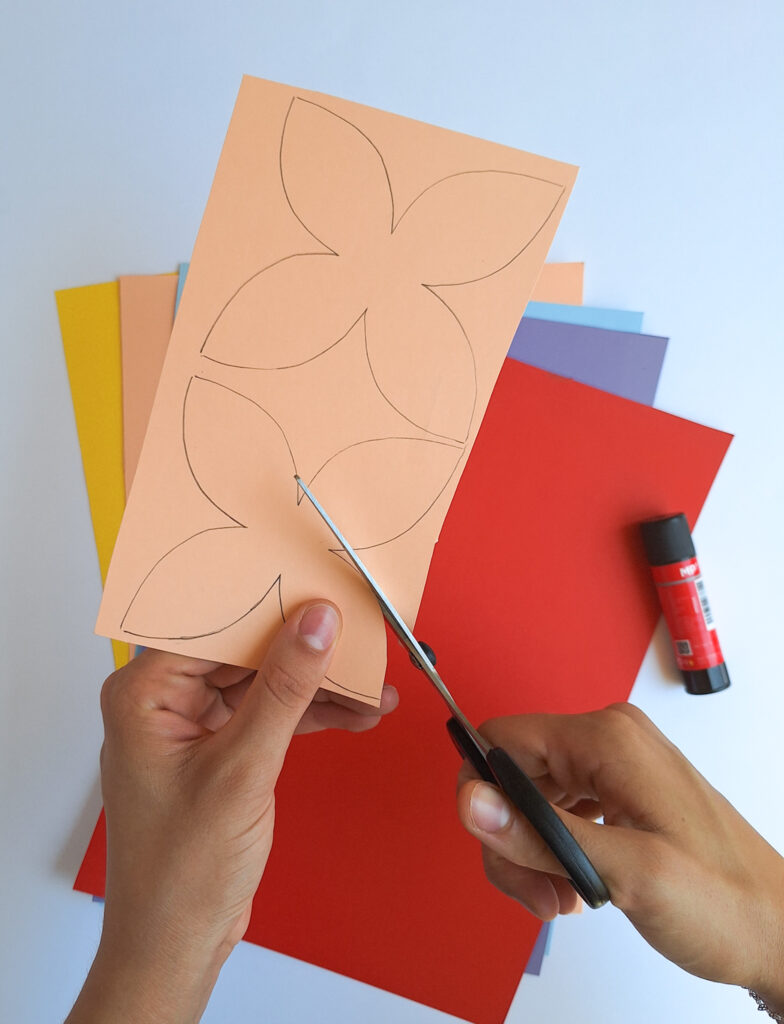
Use the template and place the mold on the chosen colored cardstock. Trace the shape.
Step 2
Cut out all the traced shapes.
Step 3
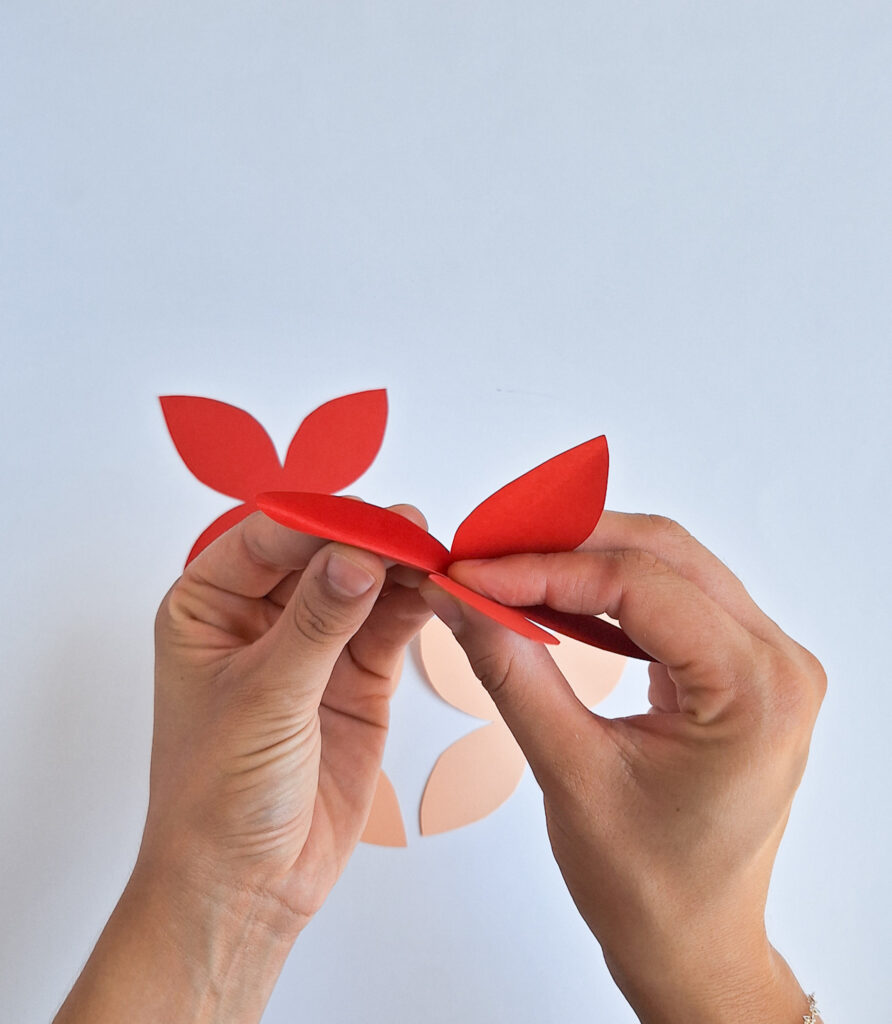
Slightly fold each petal in half to create volume.
Step 4
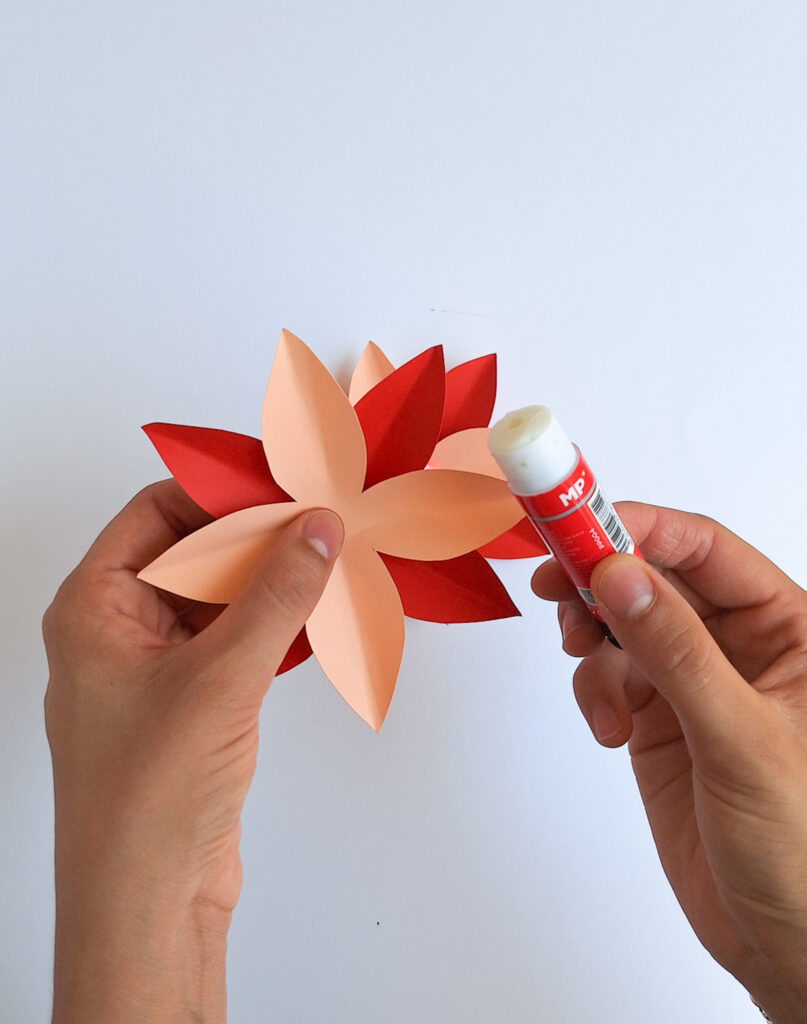
Glue two shapes on top of each other, rotated 90 degrees from each other.
Step 5
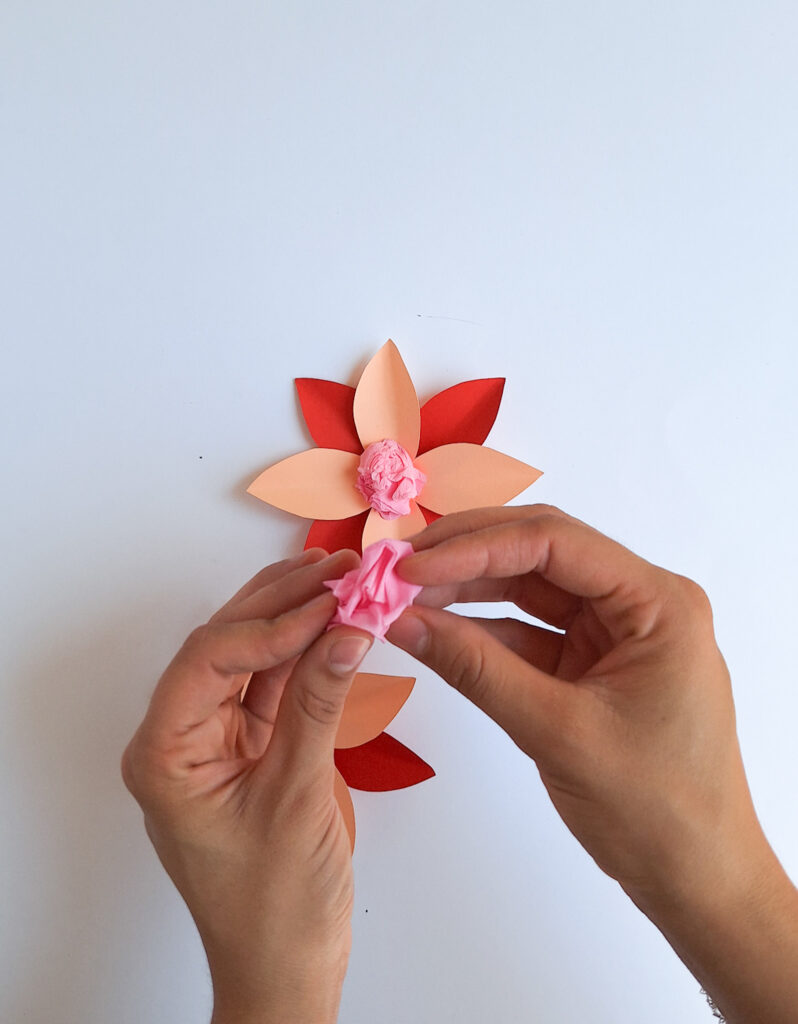
Take a strip of tissue paper, crumple it into a ball, and place it at the center of the flower. Glue it in place.
Step 6
Draw two circles on the bag, one with a diameter of 35 cm and another with a diameter of 27 cm. Cut out the interior to obtain the border formed between them.
Step 7
Glue the different flowers in the order you prefer; you can alternate colors for variety.
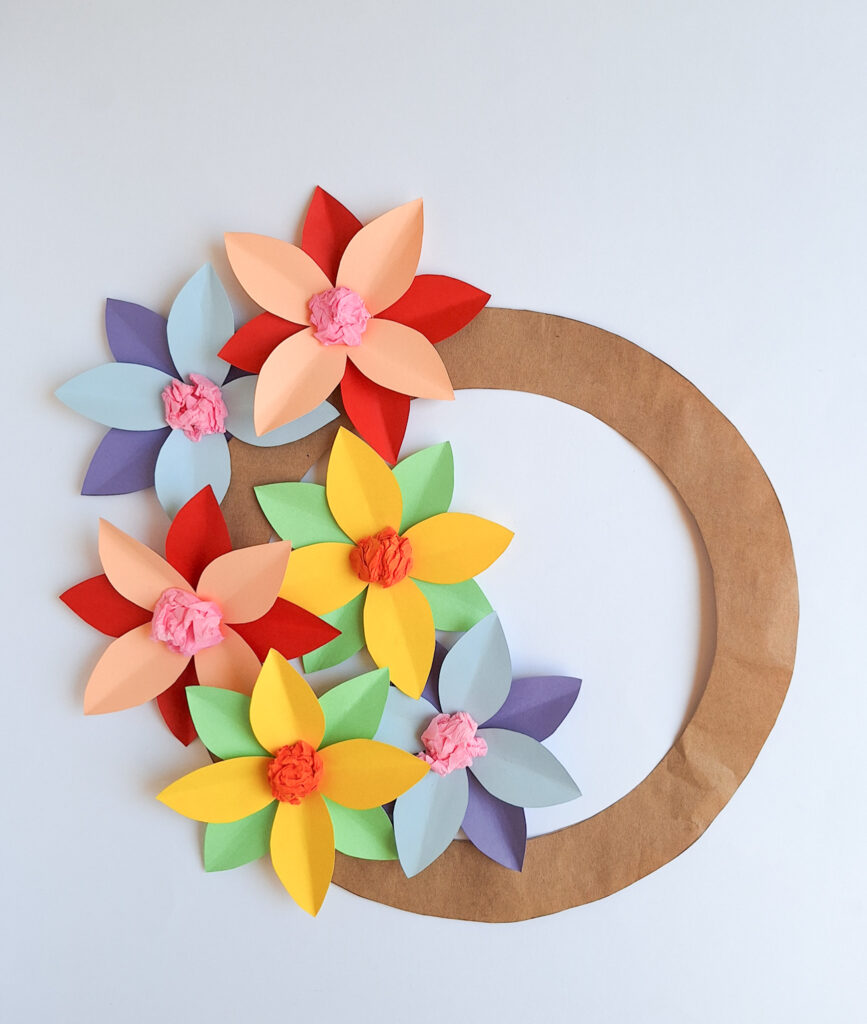
And that’s it. Now you have a beautiful Paper Flower Wreath.


DIY Paper Flower Wreath
Materials
- Colored Craft Papers
- Glue
- Scissor
- Tissue Paper
- Recycled Paper Bag
Instructions
- Use the template and place the mold on the chosen colored cardstock. Trace the shape.
- Cut out all the traced shapes.
- Slightly fold each petal in half to create volume.
- Glue two shapes on top of each other, rotated 90 degrees from each other.
- Take a strip of tissue paper, crumple it into a ball, and place it at the center of the flower. Glue it in place.
- Draw two circles on the bag, one with a diameter of 35 cm and another with a diameter of 27 cm. Cut out the interior to obtain the border formed between them.
- Glue the different flowers in the order you prefer; you can alternate colors for variety.
Other Posts You Might Like
- DIY Heart Paper Flowers
- Fun and Easy Paper Flower Craft
- How to Make Large Paper Flowers
- Valentine’s Day Tissue Paper Heart Card
- 15 Crafty Ways to Upcycle Your Old Wine Bottles
- Upcycle Your Wine Corks with These 15 Creative Craft Ideas
- 16 Lovely DIY Crafts That Will Transform Your Backyard Space
Tamara White is the creator and founder of The Thrifty Apartment, a home decor and DIY blog that focuses on affordable and budget-friendly home decorating ideas and projects. Tamara documents her home improvement journey, love of thrifting, tips for space optimization, and creating beautiful spaces.
- Tamara White
- Tamara White
- Tamara White
- Tamara White
- Tamara White
- Tamara White
- Tamara White
- Tamara White
- Tamara White
- Tamara White
- Tamara White
- Tamara White
- Tamara White
- Tamara White
- Tamara White
- Tamara White
- Tamara White
- Tamara White
- Tamara White
- Tamara White
- Tamara White
- Tamara White
- Tamara White
- Tamara White
- Tamara White
- Tamara White
- Tamara White
- Tamara White
- Tamara White
- Tamara White
- Tamara White
- Tamara White
- Tamara White
- Tamara White
- Tamara White
- Tamara White
- Tamara White
- Tamara White
- Tamara White
- Tamara White
- Tamara White
- Tamara White
- Tamara White
- Tamara White
- Tamara White
- Tamara White
- Tamara White
- Tamara White
- Tamara White
- Tamara White
- Tamara White
- Tamara White
- Tamara White
- Tamara White
- Tamara White
- Tamara White
- Tamara White
- Tamara White
- Tamara White
- Tamara White
- Tamara White
- Tamara White
- Tamara White
- Tamara White
- Tamara White
- Tamara White
- Tamara White
- Tamara White
- Tamara White
- Tamara White
- Tamara White
- Tamara White
- Tamara White
- Tamara White
- Tamara White
- Tamara White
- Tamara White
- Tamara White
- Tamara White
- Tamara White
- Tamara White
- Tamara White
- Tamara White
- Tamara White
- Tamara White
- Tamara White
- Tamara White
- Tamara White
- Tamara White
- Tamara White
- Tamara White
- Tamara White
- Tamara White
- Tamara White
- Tamara White
- Tamara White
- Tamara White
- Tamara White
- Tamara White
- Tamara White
- Tamara White
- Tamara White
- Tamara White
- Tamara White
- Tamara White
- Tamara White
- Tamara White
- Tamara White
- Tamara White
- Tamara White
- Tamara White
- Tamara White
- Tamara White
- Tamara White
- Tamara White
- Tamara White
- Tamara White
- Tamara White
- Tamara White
- Tamara White
- Tamara White
- Tamara White
- Tamara White
- Tamara White
- Tamara White
- Tamara White
- Tamara White
- Tamara White
- Tamara White
- Tamara White
- Tamara White
- Tamara White
- Tamara White
- Tamara White
- Tamara White
- Tamara White
- Tamara White
- Tamara White
- Tamara White
- Tamara White
- Tamara White
- Tamara White
- Tamara White
- Tamara White
- Tamara White
- Tamara White
- Tamara White
- Tamara White
- Tamara White
- Tamara White
- Tamara White
- Tamara White
- Tamara White
- Tamara White
- Tamara White
- Tamara White
- Tamara White
- Tamara White
- Tamara White
- Tamara White
- Tamara White
- Tamara White
- Tamara White
- Tamara White
- Tamara White
- Tamara White
- Tamara White
- Tamara White
- Tamara White
- Tamara White
- Tamara White
- Tamara White
- Tamara White
- Tamara White
- Tamara White
- Tamara White
- Tamara White
- Tamara White
- Tamara White
- Tamara White
- Tamara White
- Tamara White
- Tamara White
- Tamara White
- Tamara White
- Tamara White
- Tamara White
- Tamara White
- Tamara White
- Tamara White
- Tamara White
- Tamara White
- Tamara White
- Tamara White
- Tamara White
- Tamara White
- Tamara White
- Tamara White
- Tamara White
- Tamara White
- Tamara White
- Tamara White
- Tamara White
- Tamara White
- Tamara White
- Tamara White
- Tamara White
- Tamara White
- Tamara White
- Tamara White
- Tamara White
- Tamara White
- Tamara White
- Tamara White
- Tamara White
- Tamara White
- Tamara White
- Tamara White
- Tamara White
- Tamara White
- Tamara White
- Tamara White
- Tamara White
- Tamara White
- Tamara White
- Tamara White
- Tamara White
- Tamara White
- Tamara White
- Tamara White
- Tamara White